IT IS FINISHED!!!
So after 6, maybe even 7 months, the nursery is finally done. Yes, that's right. Half a year to finish the smallest room in the house. Yikes. But come, take my hand and I will walk you through this modest room's magical 'restoration'. (OK...I wish it was magical...it was really just lots and lots of tedious work)
For reference, here is a floorplan of the nursery.*
*Legal Disclaimer - This was created in Microsoft paint. All measurements and scales are approximate.

We'll start with the walls.
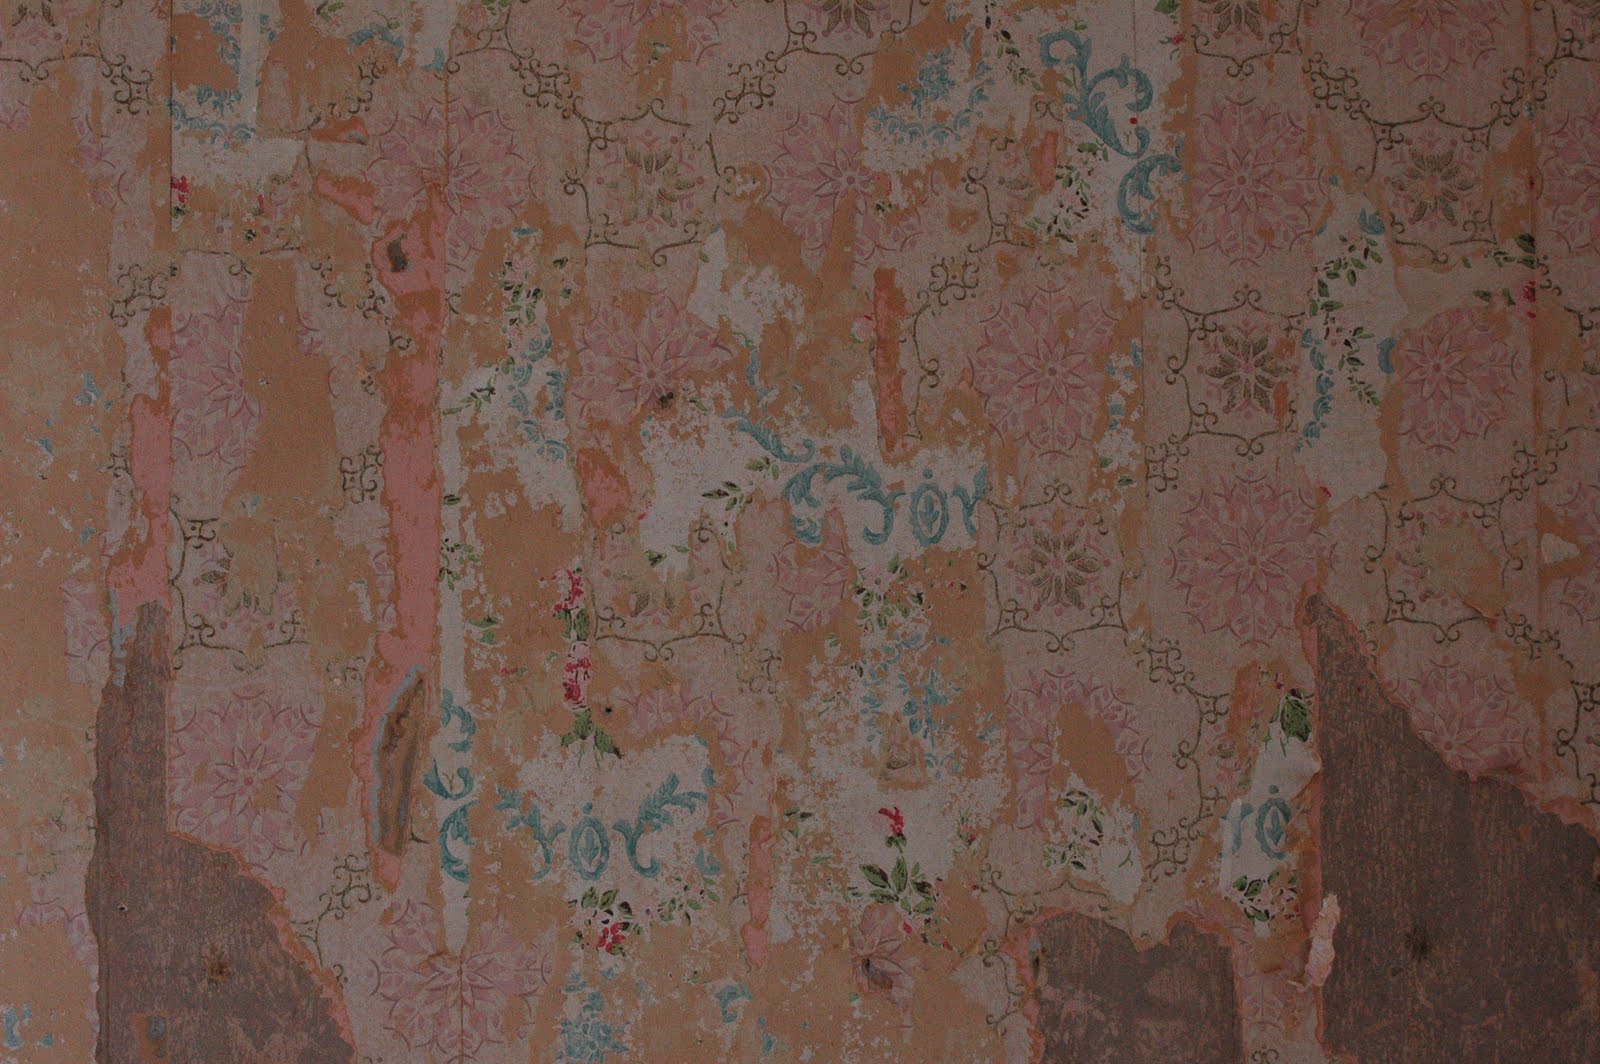
Here is a picture of the room before we touched it. Wallpaper, and painted wallpaper on the ceiling. Yay.
 It was actually a lot of fun removing the various layers of wallpaper and seeing all the different patterns they had used over the last 126 years. Some of them I really liked. What was also nice is that this stuff was SO much easier to remove than the stuff in the parlor. Not nearly so many layers of paint to contend with (Just one layer of Pepto-bismal pink paint (which was also a layer on the trim). Methinks we weren't the first to use this room as a nursery).


 You can see the pink paint in this picture...


 After the wallpaper was removed, I repaired the plaster. While not hard, this took a long time. You drill holes on either side of cracks, or anywhere where the plaster has started separating from the lathe, shoot some plaster adhesive back there, and then use screws and washers to bring the plaster back in contact with the lathing. This takes 24 hrs. to dry. When it is dry, you fill the holes/cracks with Durabond Easysand, sand it down, and you have a smooth surface ready for paint! (O.K. so Durabond isn't exactly the most historically accurate material...but it meshes well with my lack of skill...)
 This is a chunk of loose plaster that I had to pull out. I show this to demonstrate just how thick this stuff is. Granted, this is from an exterior wall, and the interior walls are only half that thick...but that's a good two inches of basically concrete walls. That is STRONG! Another benefit is the sound dampening qualities. (Remember this is Aundrea's nursery. Sound dampening is GOOD!)

Here's Prego Steph cleaning the walls with TSP.

Steph picked out the paint colors. She chose brown for below the chair rail, essentially white above, and a light blue ceiling. The first brown she chose turned out to be the color of chocolate milk. We agreed that it was way too light of a brown, so we went back to Sherman Williams and got one of the darkest browns they had. MUCH better.

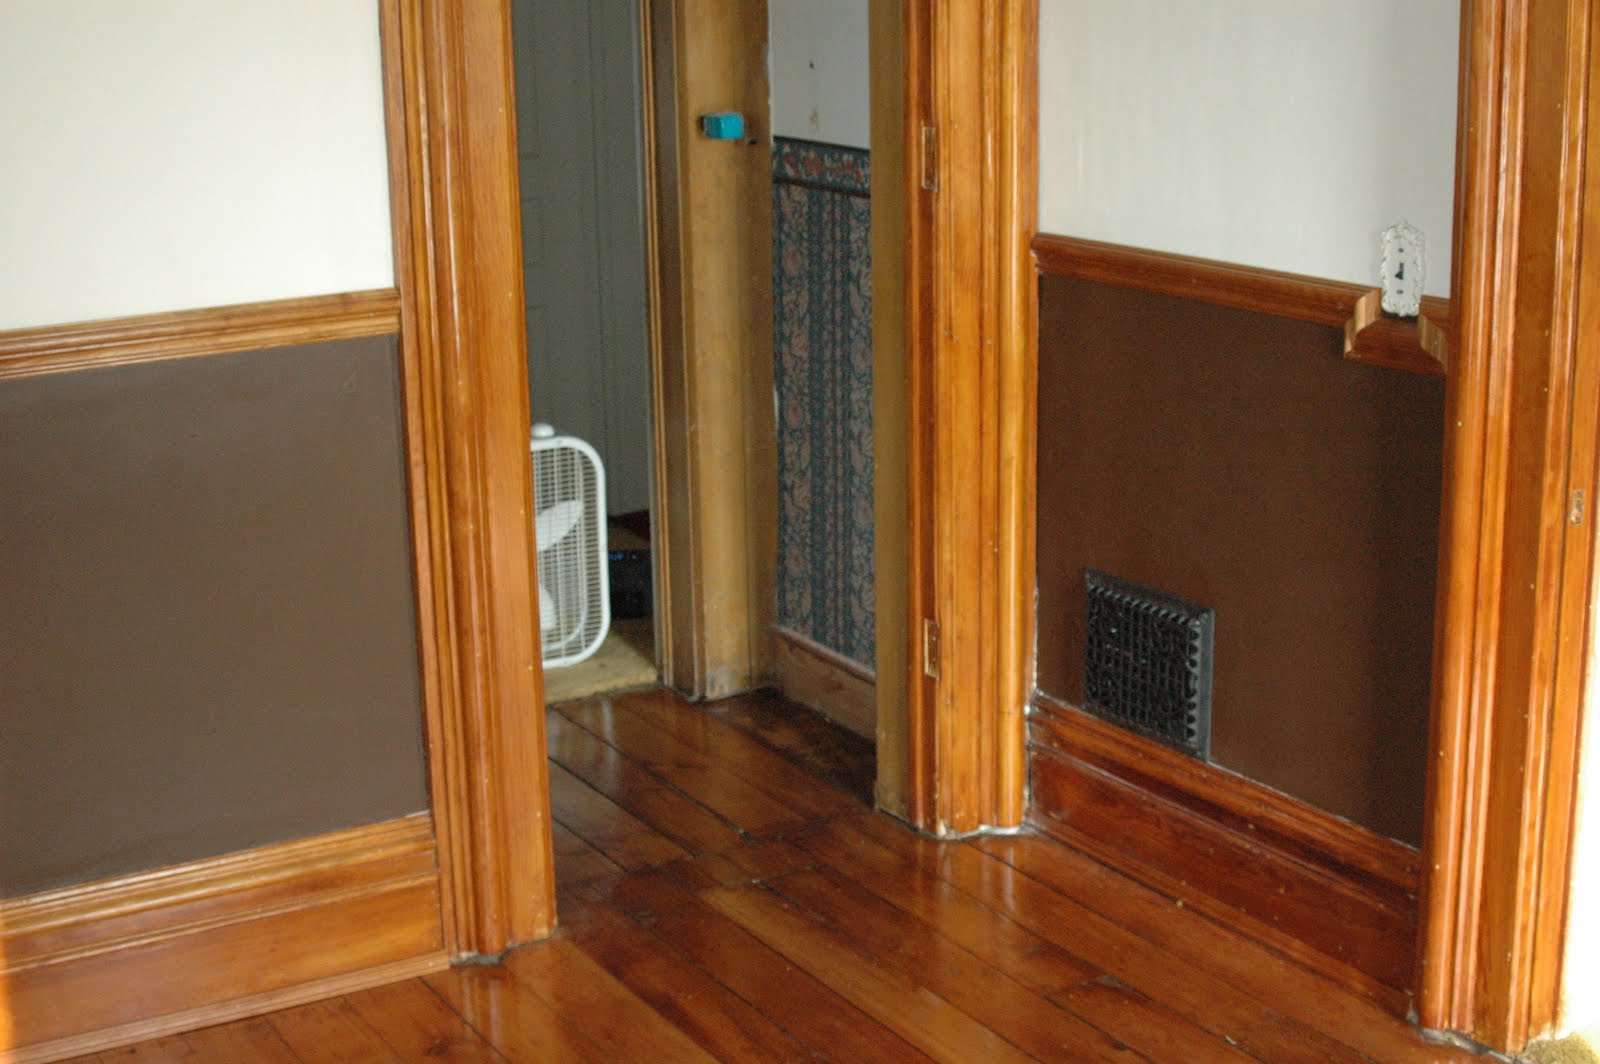
 Instead of the ugly 1970's heat register they had, I bought an antique cast iron register and restored it. While in a different room, here's a picture of what the heat grate looked like (Bottom right corner):
 The only problem was that it was a few inches larger than the old one, so the hole had to be opened up a bit. This wreaked havoc on the plaster, and more durabond repairs were necessary.

OK! Next, the trim. As you can see, it was all painted white. Now, to be fair, since the upstairs didn't use the expensive wood used to impress company downstairs, this was probably always painted. But, I rather firmly believe that ANY wood is prettier than paint, so the paint had to go. There were days...heck, months that I regretted this decision, but in the end, I'm glad I put the work into it.
So again...before. Painted trim.

One of the first tools I bought when we moved into this house was an In-fared Paint Remover. Safer, faster, and easier than a heat gun. Makes the paint bubble up and elasticky and you scrape it off. This is good because it doesn't create any dust, which, since it is almost a guarantee that there is lead paint, you really don't want dust. It also doesn't get the paint hot enough to release lead gas...also a bad thing. Finally, after many hours of scraping, I got through removing the paint. Or did I....?


 Here is a close up of the trim after that once over with the In-fared Paint Remover. As you can see, there is still a lot of crap on that wood. My best guess is that, as I mentioned before, the wood was originally painted, and I think the first layer of paint was Milk Paint. That's right, they used to use a milk based paint. This stuff is nuke proof. There is NO good way to remove it besides sanding the tar out of it.

 In the end, this is the process I used:
1) Go over with In-fared Paint Remover
2) Go over again with super-duty paint stripper
3) Sand with 100 grit sand paper
4) Sand again with 150 grit sand paper
What you have to keep in mind through all of this is that, because of all the different profiles used in this trim, there was no way to do it all at once. You had to go over each routered edge, each flat spot, each curve individually for each of those four steps. There are two windows, two doors, and then the floorboards. I estimate that each of these took me about 26-30 hours to fully strip. But I was pretty pleased with the end result.


 Next, the floors. Believe it or not, we didn't want to keep the toxic-green quasi-shag carpet that came with the house. I know, we have no taste at all.
 So we pulled out the carpet and were quite surprised to find, not wood floors, but linoleum hiding underneath. I know what you're thinking..."How lucky! How fortunate! I can now forgive them for pulling up that beautiful green carpet...as long as they keep this classy gem! I mean, look! It even has paths laid out! What more do you want?!?"
Well start writing the hate-mail because we pulled this up too. I know, we're going to designer hell for this.


Finally, underneath the linoleum we found the wood floor. Oh boy...this was going to be some work. Thick brown paint, again undoubtedly lead paint, covered a pretty rough looking floor.


 Steph used the In-Fared Paint Remover to scrape most of that brown paint off, and then I rented a drum sander to do the rest. For the most part, we're pretty pleased with the result. There are four or five boards between the two doors that are going to have to be replaced at some point...they have some gaps between 'em large enough for Aundrea to fall through and end up chillin' with Alice in Wonderland. But we didn't bother with it yet since we just wanted to hurry up and finish the room so we could move Aundrea in.
One thing learned the hard way...save the floor for ABSOLUTELY LAST!! I installed the chair rail and crown molding after sanding the floor and put a few pretty nasty gouges in it. Oops.


 This is the closet. We didn't do anything to it except the floor. I think we'll redo the rest of the closet when we redo the bathroom.
 Next came the staining...Not that too many of you will care, but for the trim I used shellac, and I am a convert. This stuff is very historical, and does a fantastic job of giving it that antique look (all the nicks, scratches and paint that I didn't quite get out certainly help...). It only needs an hour to dry, so you can apply all the necessary layers in one day. Also, it is very easy to apply, and it is exceptionally easy to repair in case of scratches. It will also outlast your typical poly varnish.
For what was there I did three layers of Garnet Shellac, and one layer of Clear Coat Shellac. For the trim I added (Chair Rail, Crown, and Shoe (shoe molding covers the gap between the floor and the baseboards)) I did one layer of Garnet, and two layers of clear.
On the floor I used Waterlox Original, and am VERY pleased. It's a bit more expensive than some of the Polyurethane stuff you'd find at Lowes, but it's a recipe the company has been making for over 100 years, and so it too does a great job of giving it that antique look. One of the major complaints I read about this was the smell. I applied this in late Nov. It was snowing outside, and so I couldn't open the windows too wide for ventilation. Despite this, it still dried in 24 hours, and while there is a very faint odor, I did not have any of the problems some people talked about (I suppose if you absolutely hate the smell of the stuff, that faint odor might drive you nuts, but I kinda think it smells good...and it certainly didn't make the whole house stink. Just the upstairs.).
Lastly, and unfortunately I don't have any pics of the install process, came the chair rail and the crown molding. As some of you may or may not remember, earlier this year I picked up over a mile of molding, all of it Cherry, Mahogany and Walnut from a place in Detroit that was going out of business and auctioning off their stock. For the nursery we went with Cherry since it is a lighter, more playful wood.
As I was doing research on how to install crown molding I came across a website which read "If you are thinking of installing crown molding in an older home, my first piece of advice is DON'T!"
"Ha!" I thought. "Maybe even double Ha!" I had, at that point, already installed the chair rail, and despite a few minor set backs, that was easy enough. So how much harder could this be?
The answer? MUCH! MUCH MUCH MUCH HARDER!! This was by far the most infuriating part of the entire redo. If you're interested in my sob story, keep reading. Otherwise, feel free to skip to the 'after' pics.
To start the (sob) story, I bought a how to book on installing crown molding. In this book they have several different molding projects. I found the one that most closely matched what I was going to be doing, and used that as my guideline. One of the things it told me to do was to rip a 2x4 diagonally so you have something to nail the crown molding to. Well, I don't have a table saw, so this was not easy. I had to use a circular saw...and to say that the lines weren't particularly straight would be a dramatic understatement. But...I figured it was close enough, and nailed them up. Then I went to install my first piece of molding. The ripped 2x4 stuck too far out, and the molding didn't reach the wall (The project in the book I was using as a model was for 7 in. molding, I was using 4.25 in. I thought I had adjusted the dimensions appropriately, but math has never been my strong suite). So I had to take it all down, and re-cut it so the 2x4s were narrower. Keep in mind that these ceilings are 10 ft. tall, and I'm doing all of this by myself on a ladder. So getting them up and in the right place was not at all easy in the first place.
So I re cut them, and get them up. I then nail the first piece of molding up, both ends butted against the wall. Please understand, our house is old. The house has shifted and settled. There is not a clean 90 degree angle to be found...ANYWHERE. The ceiling will suddenly dip down half an inch and then go back up and the wall wavers back and forth like David Hasselhoff after Happy Hour. What I'm trying to say is that in several spots, the molding does not meet the wall...and in other spots it doesn't meet the ceiling. Far from it. But I realized this was going to happen going into it and, while I wasn't thrilled, I accepted it. What I didn't anticipate was how difficult it was going to be to get the joints to meet.
The type of joints I had to use are called 'coping joints'. I can't really explain how it is done, so if you really want to know how to do it, go watch a youtube video on it. But let me warn you. They make it look easy. They rip through it in about 25 seconds, and it is perfect. It is not easy. I will say I did improve from it taking me 10 minutes to more like 4 by the time I was done, but still.
It's done with a handsaw, and you have to follow the profile of the molding exactly. You then have to file down any places that weren't exact. I did this several times before getting it right. I then brought it up and, naturally, it didn't fit against the first piece at all. At this point my parents were in town visiting for the weekend, and my dad was helping me. We finally decided that I was going to have to rip the first board down and reposition it at a different angle. Which we did. And it fit better. But still a far cry from cleanly.
At this point I thought I had it more or less figured out and my dad and I quit. My parents leave, and I attempt to do the next piece on my own. It didn't go well. Many a tempers were lost, many a potty words were growled ferociously. I had to quit several times before I broke something.
In the end, I basically had to use scrap pieces and experiment with different angles, doing the coping saw cut each time, until I got the angle right. Sometimes I had to do it three or four times before I got it right, and then had to do it all over again for the next corner. Not fun. Anyway, I finally finished it on my birthday, and it certainly adds to the room. Just don't look at the corners too closely if you visit. I'm not going to lie though, part of me wishes I hadn't bought all that trim because now I feel obligated to install the wretched stuff in all of the rooms. And I dread that.
[End sob story about Crown Molding.]
AND NOW....WITHOUT FURTHER ADO...THE 'AFTER' PICTURES OF AUNDREA'S NURSERY!!!!
We'll start with some pictures of the floor. Oh, in case you're wondering, the original trim, baseboards and floor are white pine.

 Here are some of those gaps I was talking about... :(


Again, the closet floor. The only thing in that closet that looks good...
 Now I will show off some of that trim that took so bloody long to strip.


Close up of the light switch. This was actually poor planning on my part. The 'line' for the chair rail actually went below the light switch, but since the chair rail was a bit thicker than just a line, I ran into a slight problem. But I'm actually glad it happened, as I think going around it looks pretty good and gives it some character.

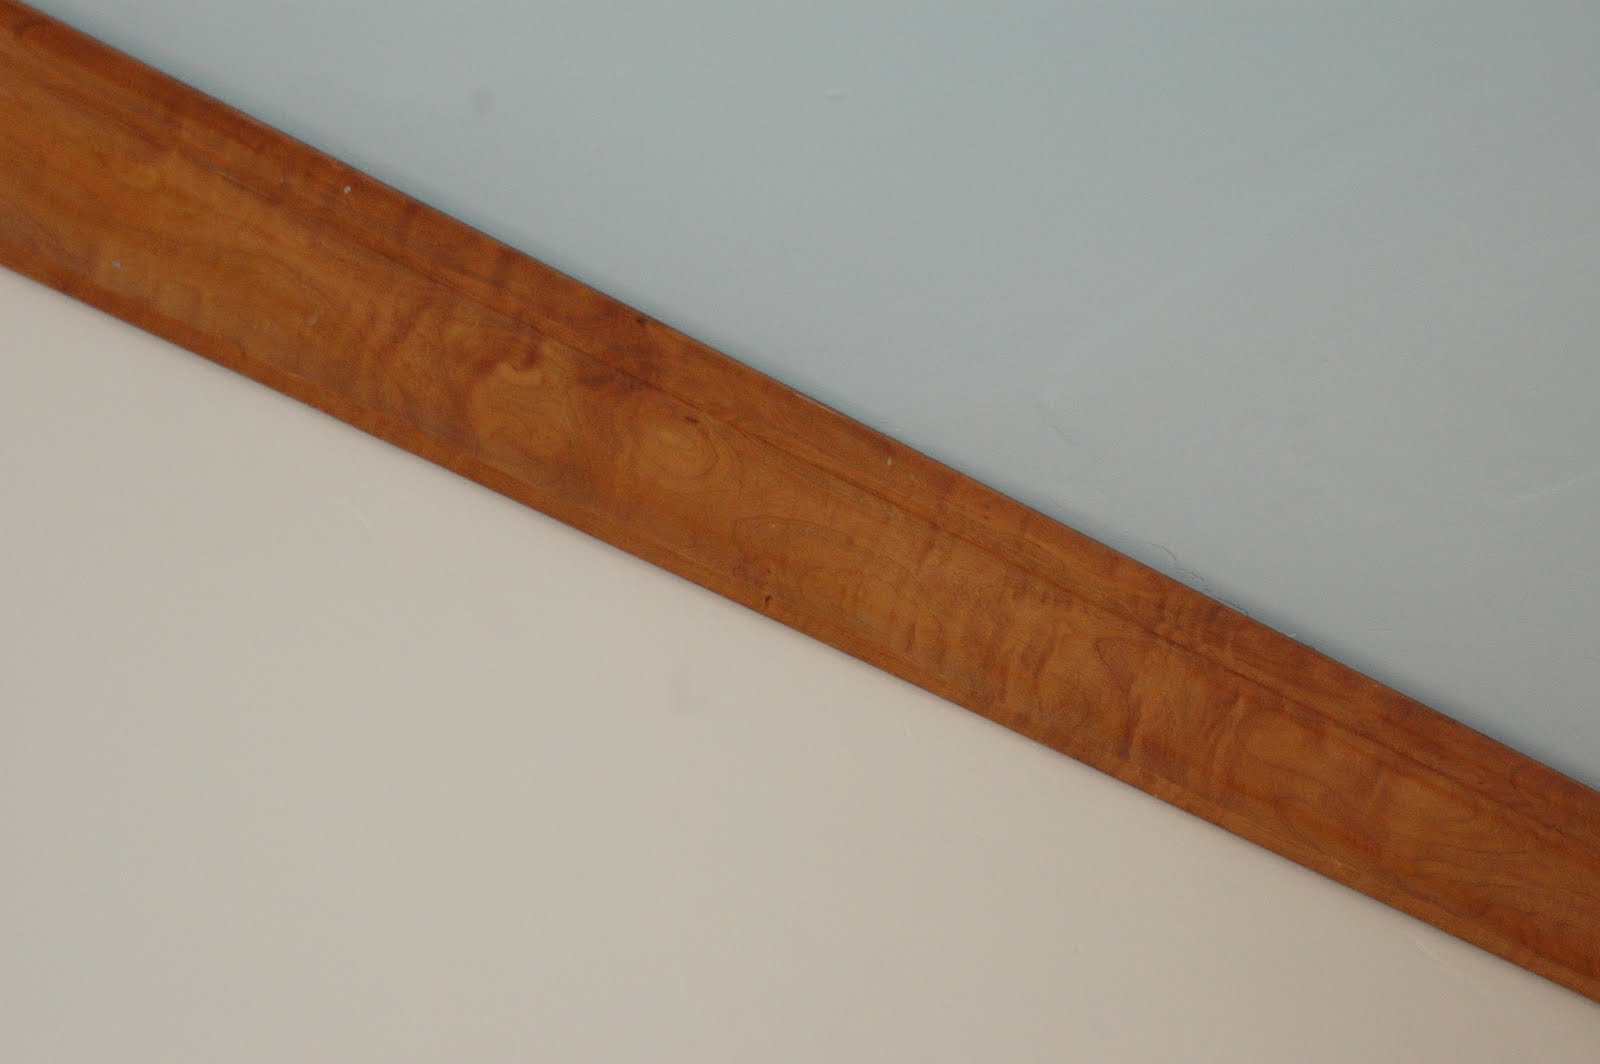
That nightmarish crown molding.


Notice the shadow on the one side...that's from the crooked ceiling...

 The antique cast iron grate I refinished...
 And the room setup with furniture.


 And that's about it! So now I will move back to the parlor/library project. Of course, that will be slow going as I recently got a long term sub position at Hopkins High School. Yeah, hour commute each way, but the money should pay for the wallpaper and wood for the bookshelves in the parlor reno...and a few other things.
Oh, and in case anyone is very perceptive and curious, we are not ditching the shutters on the windows. I just need to figure out a way to strip the paint that won't drive me to insanity and/or suicide.
For reference, here is a floorplan of the nursery.*
*Legal Disclaimer - This was created in Microsoft paint. All measurements and scales are approximate.

We'll start with the walls.
Here is a picture of the room before we touched it. Wallpaper, and painted wallpaper on the ceiling. Yay.
 It was actually a lot of fun removing the various layers of wallpaper and seeing all the different patterns they had used over the last 126 years. Some of them I really liked. What was also nice is that this stuff was SO much easier to remove than the stuff in the parlor. Not nearly so many layers of paint to contend with (Just one layer of Pepto-bismal pink paint (which was also a layer on the trim). Methinks we weren't the first to use this room as a nursery).

 You can see the pink paint in this picture...
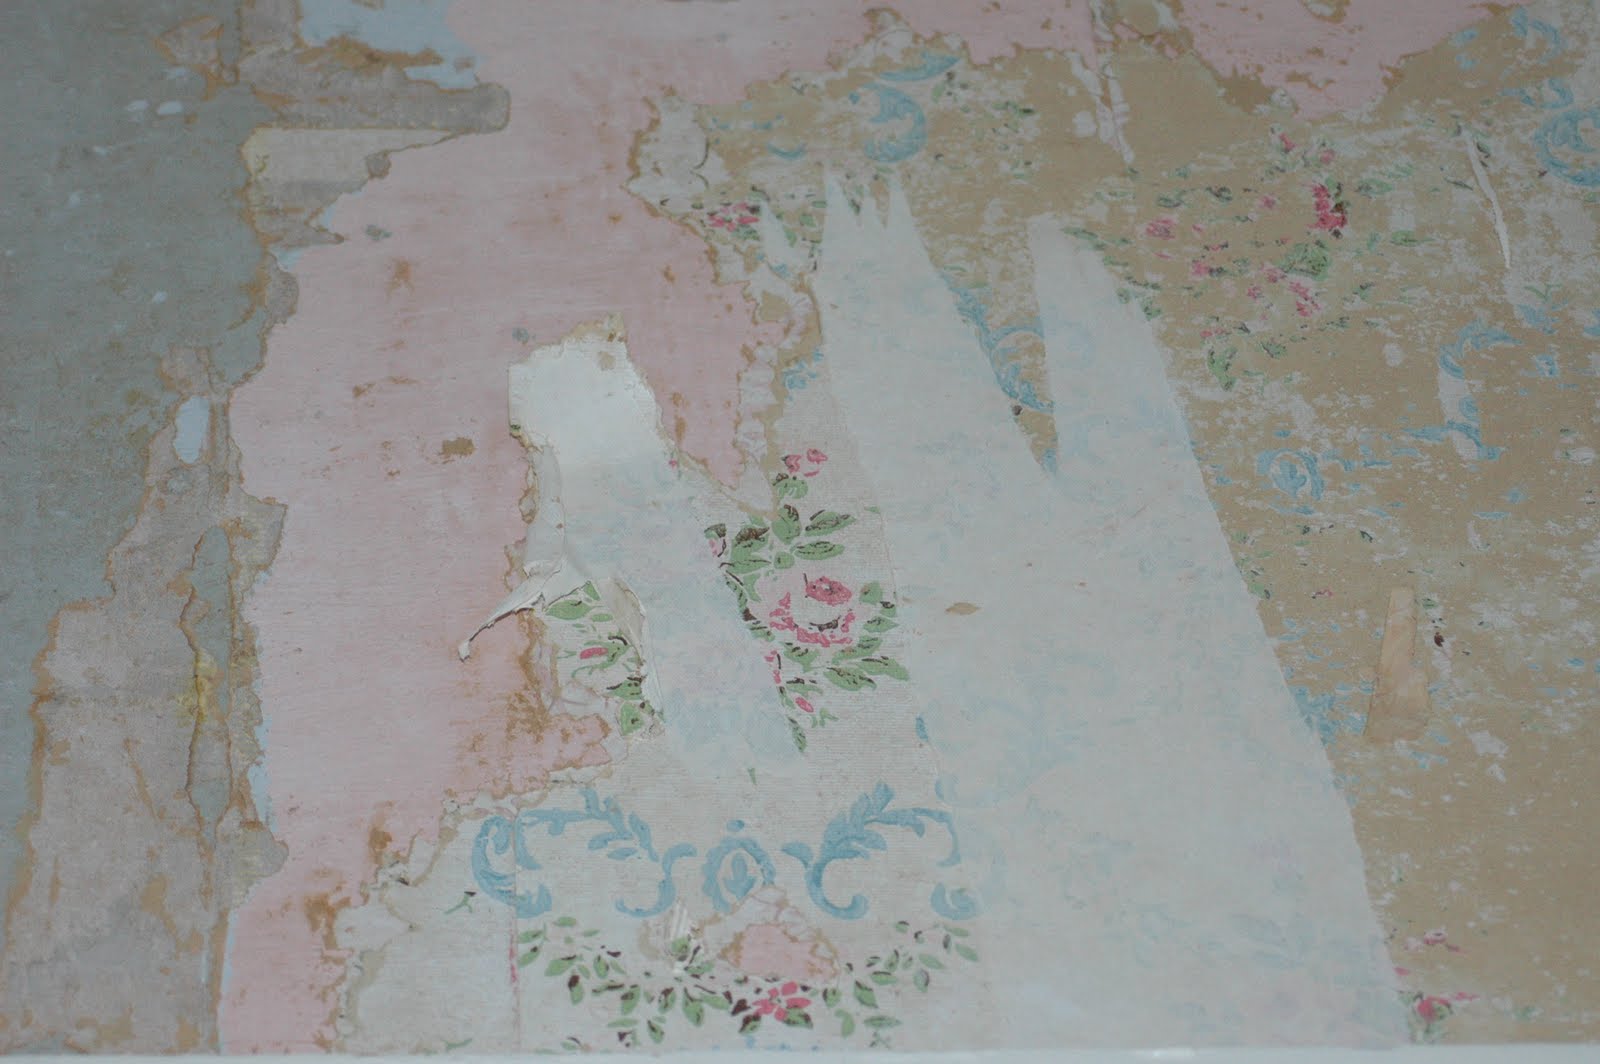


 After the wallpaper was removed, I repaired the plaster. While not hard, this took a long time. You drill holes on either side of cracks, or anywhere where the plaster has started separating from the lathe, shoot some plaster adhesive back there, and then use screws and washers to bring the plaster back in contact with the lathing. This takes 24 hrs. to dry. When it is dry, you fill the holes/cracks with Durabond Easysand, sand it down, and you have a smooth surface ready for paint! (O.K. so Durabond isn't exactly the most historically accurate material...but it meshes well with my lack of skill...)
 This is a chunk of loose plaster that I had to pull out. I show this to demonstrate just how thick this stuff is. Granted, this is from an exterior wall, and the interior walls are only half that thick...but that's a good two inches of basically concrete walls. That is STRONG! Another benefit is the sound dampening qualities. (Remember this is Aundrea's nursery. Sound dampening is GOOD!)
Here's Prego Steph cleaning the walls with TSP.

Steph picked out the paint colors. She chose brown for below the chair rail, essentially white above, and a light blue ceiling. The first brown she chose turned out to be the color of chocolate milk. We agreed that it was way too light of a brown, so we went back to Sherman Williams and got one of the darkest browns they had. MUCH better.

 Instead of the ugly 1970's heat register they had, I bought an antique cast iron register and restored it. While in a different room, here's a picture of what the heat grate looked like (Bottom right corner):
 The only problem was that it was a few inches larger than the old one, so the hole had to be opened up a bit. This wreaked havoc on the plaster, and more durabond repairs were necessary.
OK! Next, the trim. As you can see, it was all painted white. Now, to be fair, since the upstairs didn't use the expensive wood used to impress company downstairs, this was probably always painted. But, I rather firmly believe that ANY wood is prettier than paint, so the paint had to go. There were days...heck, months that I regretted this decision, but in the end, I'm glad I put the work into it.
So again...before. Painted trim.

One of the first tools I bought when we moved into this house was an In-fared Paint Remover. Safer, faster, and easier than a heat gun. Makes the paint bubble up and elasticky and you scrape it off. This is good because it doesn't create any dust, which, since it is almost a guarantee that there is lead paint, you really don't want dust. It also doesn't get the paint hot enough to release lead gas...also a bad thing. Finally, after many hours of scraping, I got through removing the paint. Or did I....?


 Here is a close up of the trim after that once over with the In-fared Paint Remover. As you can see, there is still a lot of crap on that wood. My best guess is that, as I mentioned before, the wood was originally painted, and I think the first layer of paint was Milk Paint. That's right, they used to use a milk based paint. This stuff is nuke proof. There is NO good way to remove it besides sanding the tar out of it.
 In the end, this is the process I used:
1) Go over with In-fared Paint Remover
2) Go over again with super-duty paint stripper
3) Sand with 100 grit sand paper
4) Sand again with 150 grit sand paper
What you have to keep in mind through all of this is that, because of all the different profiles used in this trim, there was no way to do it all at once. You had to go over each routered edge, each flat spot, each curve individually for each of those four steps. There are two windows, two doors, and then the floorboards. I estimate that each of these took me about 26-30 hours to fully strip. But I was pretty pleased with the end result.


 Next, the floors. Believe it or not, we didn't want to keep the toxic-green quasi-shag carpet that came with the house. I know, we have no taste at all.
 So we pulled out the carpet and were quite surprised to find, not wood floors, but linoleum hiding underneath. I know what you're thinking..."How lucky! How fortunate! I can now forgive them for pulling up that beautiful green carpet...as long as they keep this classy gem! I mean, look! It even has paths laid out! What more do you want?!?"
Well start writing the hate-mail because we pulled this up too. I know, we're going to designer hell for this.


Finally, underneath the linoleum we found the wood floor. Oh boy...this was going to be some work. Thick brown paint, again undoubtedly lead paint, covered a pretty rough looking floor.


 Steph used the In-Fared Paint Remover to scrape most of that brown paint off, and then I rented a drum sander to do the rest. For the most part, we're pretty pleased with the result. There are four or five boards between the two doors that are going to have to be replaced at some point...they have some gaps between 'em large enough for Aundrea to fall through and end up chillin' with Alice in Wonderland. But we didn't bother with it yet since we just wanted to hurry up and finish the room so we could move Aundrea in.
One thing learned the hard way...save the floor for ABSOLUTELY LAST!! I installed the chair rail and crown molding after sanding the floor and put a few pretty nasty gouges in it. Oops.


 This is the closet. We didn't do anything to it except the floor. I think we'll redo the rest of the closet when we redo the bathroom.
 Next came the staining...Not that too many of you will care, but for the trim I used shellac, and I am a convert. This stuff is very historical, and does a fantastic job of giving it that antique look (all the nicks, scratches and paint that I didn't quite get out certainly help...). It only needs an hour to dry, so you can apply all the necessary layers in one day. Also, it is very easy to apply, and it is exceptionally easy to repair in case of scratches. It will also outlast your typical poly varnish.
For what was there I did three layers of Garnet Shellac, and one layer of Clear Coat Shellac. For the trim I added (Chair Rail, Crown, and Shoe (shoe molding covers the gap between the floor and the baseboards)) I did one layer of Garnet, and two layers of clear.
On the floor I used Waterlox Original, and am VERY pleased. It's a bit more expensive than some of the Polyurethane stuff you'd find at Lowes, but it's a recipe the company has been making for over 100 years, and so it too does a great job of giving it that antique look. One of the major complaints I read about this was the smell. I applied this in late Nov. It was snowing outside, and so I couldn't open the windows too wide for ventilation. Despite this, it still dried in 24 hours, and while there is a very faint odor, I did not have any of the problems some people talked about (I suppose if you absolutely hate the smell of the stuff, that faint odor might drive you nuts, but I kinda think it smells good...and it certainly didn't make the whole house stink. Just the upstairs.).
Lastly, and unfortunately I don't have any pics of the install process, came the chair rail and the crown molding. As some of you may or may not remember, earlier this year I picked up over a mile of molding, all of it Cherry, Mahogany and Walnut from a place in Detroit that was going out of business and auctioning off their stock. For the nursery we went with Cherry since it is a lighter, more playful wood.
As I was doing research on how to install crown molding I came across a website which read "If you are thinking of installing crown molding in an older home, my first piece of advice is DON'T!"
"Ha!" I thought. "Maybe even double Ha!" I had, at that point, already installed the chair rail, and despite a few minor set backs, that was easy enough. So how much harder could this be?
The answer? MUCH! MUCH MUCH MUCH HARDER!! This was by far the most infuriating part of the entire redo. If you're interested in my sob story, keep reading. Otherwise, feel free to skip to the 'after' pics.
To start the (sob) story, I bought a how to book on installing crown molding. In this book they have several different molding projects. I found the one that most closely matched what I was going to be doing, and used that as my guideline. One of the things it told me to do was to rip a 2x4 diagonally so you have something to nail the crown molding to. Well, I don't have a table saw, so this was not easy. I had to use a circular saw...and to say that the lines weren't particularly straight would be a dramatic understatement. But...I figured it was close enough, and nailed them up. Then I went to install my first piece of molding. The ripped 2x4 stuck too far out, and the molding didn't reach the wall (The project in the book I was using as a model was for 7 in. molding, I was using 4.25 in. I thought I had adjusted the dimensions appropriately, but math has never been my strong suite). So I had to take it all down, and re-cut it so the 2x4s were narrower. Keep in mind that these ceilings are 10 ft. tall, and I'm doing all of this by myself on a ladder. So getting them up and in the right place was not at all easy in the first place.
So I re cut them, and get them up. I then nail the first piece of molding up, both ends butted against the wall. Please understand, our house is old. The house has shifted and settled. There is not a clean 90 degree angle to be found...ANYWHERE. The ceiling will suddenly dip down half an inch and then go back up and the wall wavers back and forth like David Hasselhoff after Happy Hour. What I'm trying to say is that in several spots, the molding does not meet the wall...and in other spots it doesn't meet the ceiling. Far from it. But I realized this was going to happen going into it and, while I wasn't thrilled, I accepted it. What I didn't anticipate was how difficult it was going to be to get the joints to meet.
The type of joints I had to use are called 'coping joints'. I can't really explain how it is done, so if you really want to know how to do it, go watch a youtube video on it. But let me warn you. They make it look easy. They rip through it in about 25 seconds, and it is perfect. It is not easy. I will say I did improve from it taking me 10 minutes to more like 4 by the time I was done, but still.
It's done with a handsaw, and you have to follow the profile of the molding exactly. You then have to file down any places that weren't exact. I did this several times before getting it right. I then brought it up and, naturally, it didn't fit against the first piece at all. At this point my parents were in town visiting for the weekend, and my dad was helping me. We finally decided that I was going to have to rip the first board down and reposition it at a different angle. Which we did. And it fit better. But still a far cry from cleanly.
At this point I thought I had it more or less figured out and my dad and I quit. My parents leave, and I attempt to do the next piece on my own. It didn't go well. Many a tempers were lost, many a potty words were growled ferociously. I had to quit several times before I broke something.
In the end, I basically had to use scrap pieces and experiment with different angles, doing the coping saw cut each time, until I got the angle right. Sometimes I had to do it three or four times before I got it right, and then had to do it all over again for the next corner. Not fun. Anyway, I finally finished it on my birthday, and it certainly adds to the room. Just don't look at the corners too closely if you visit. I'm not going to lie though, part of me wishes I hadn't bought all that trim because now I feel obligated to install the wretched stuff in all of the rooms. And I dread that.
[End sob story about Crown Molding.]
AND NOW....WITHOUT FURTHER ADO...THE 'AFTER' PICTURES OF AUNDREA'S NURSERY!!!!
We'll start with some pictures of the floor. Oh, in case you're wondering, the original trim, baseboards and floor are white pine.

 Here are some of those gaps I was talking about... :(

Again, the closet floor. The only thing in that closet that looks good...
 Now I will show off some of that trim that took so bloody long to strip.


Close up of the light switch. This was actually poor planning on my part. The 'line' for the chair rail actually went below the light switch, but since the chair rail was a bit thicker than just a line, I ran into a slight problem. But I'm actually glad it happened, as I think going around it looks pretty good and gives it some character.

That nightmarish crown molding.

Notice the shadow on the one side...that's from the crooked ceiling...

 The antique cast iron grate I refinished...
 And the room setup with furniture.


 And that's about it! So now I will move back to the parlor/library project. Of course, that will be slow going as I recently got a long term sub position at Hopkins High School. Yeah, hour commute each way, but the money should pay for the wallpaper and wood for the bookshelves in the parlor reno...and a few other things.
Oh, and in case anyone is very perceptive and curious, we are not ditching the shutters on the windows. I just need to figure out a way to strip the paint that won't drive me to insanity and/or suicide.


Comments